Automatic Ambient Sound Placer
In this chapter of “my journey into game audio”, I will show how I made use of an Unreal “Editor Utility Widget” for automatic placement of Ambient Sounds in a level.
The “Editor Utility Widget”, EUW from now, it’s a great tool to use when you want to automate repetitive task, that doing them by hand can take an immense amount of time of a Game Designer, Artist, or in this case, a Sound Designer.
Placing by hand, docens, hundreds or even thousands of Ambient Sounds in a level can take a lot of precious time in the development of a videogame. It can be even worse if you are working on a massive Open World, or if the game is in mid production, when a lot of things will be constantly changing all the time.
What if you place a “tree foliage” sfx for every tree in a Forest Level, and in two or three weeks, the Art Team decide to change the position and amount of the trees? It’s simply not very sustainable.

Thats when EUW shines in my opinion. In this example I’m showcasing a tool that searchs for all the farm animals in a level, and place the correct Ambient Sounds in their respective locations. But it can be anything, there are inimaginable scenarios when it can be use to tackle different tasks, the imagination is the only limit.
Having a set of tools that automate certain processes it’s only for the end of saving time, and use that time for polishing your sound design, that at the end, it’s the only that matters. Players don’t know or care about all the cool tools that a Sound Designer has.
The Utility
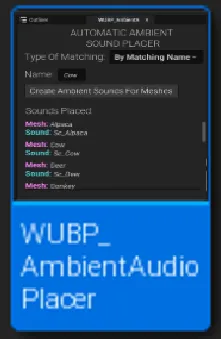
The tool it’s designed to look for Meshes (Skeletal Meshes in this case) in the current level, and create or “spawn” Ambient Sounds for them.

As seen in the GIF above, I wanted to make a tool that it’s somewhat user/designer friendly, and that covers different scenarios of “matchmaking”. I wanted to keep things simple, so matching by a predefined Data Table and by matching name was sufficient.
The Assets to match
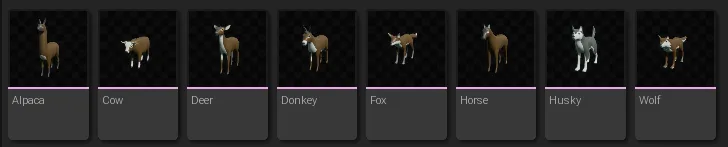
The “farm animal” Meshes are from Quaternius, a very talented 3D Artist that I worked with in Blue Fire. He has tons of free 3D art in his web page, it’s great.

I quickly put together some Sound Cues just for testing.
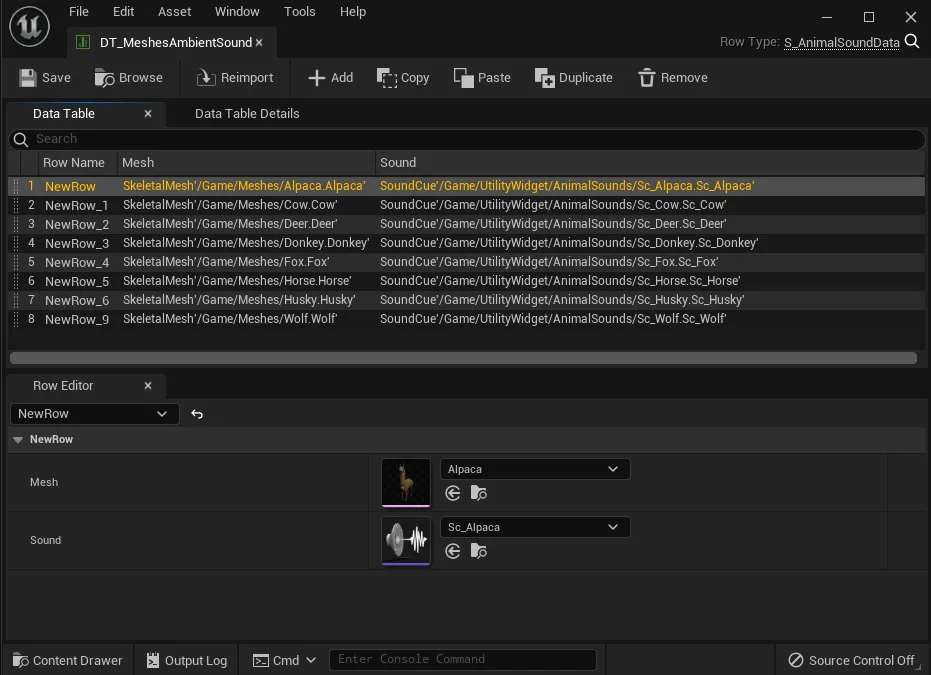
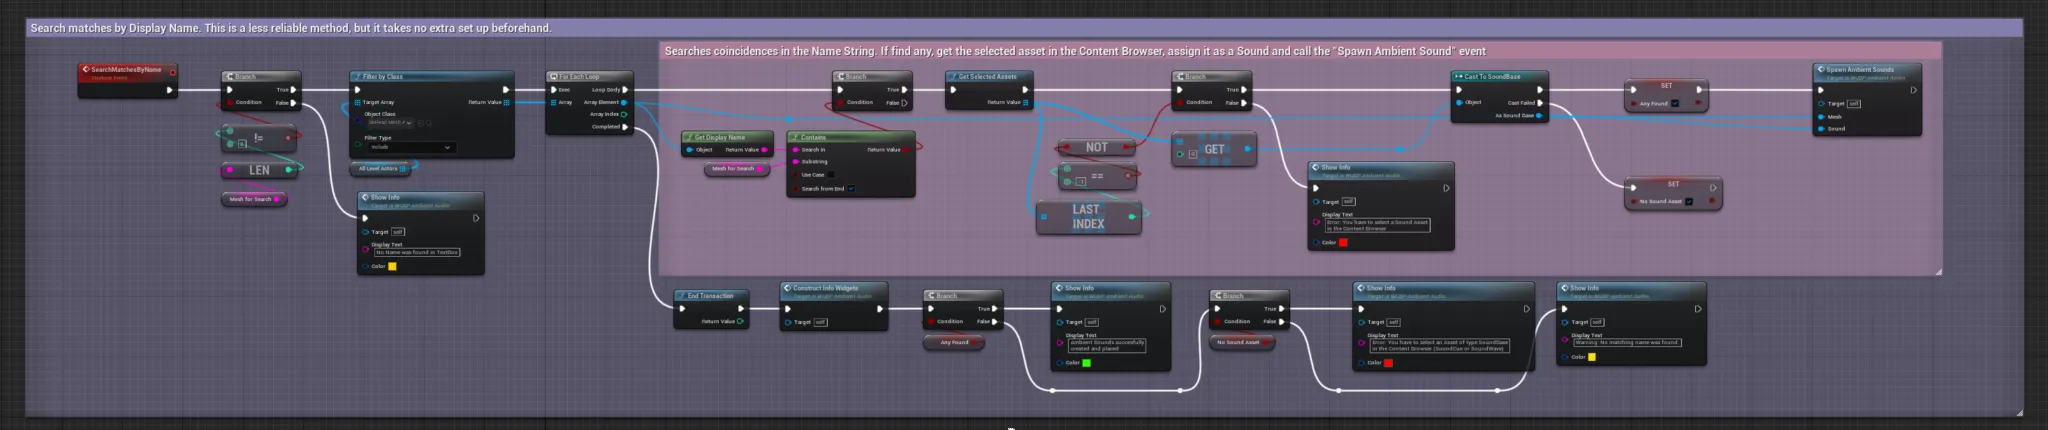
The Data Table
Data Tables are great for… tables of data. Joking aside, their are very simple to use, you just have to create a Struct, with your Variable Types, and assign it to a Data Table.

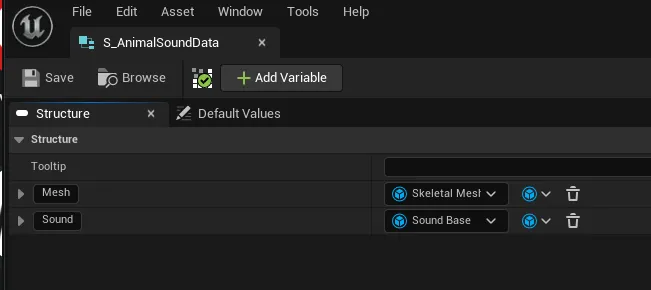
And that’s it. You can start manually inserting Meshes with their respective Sounds. This is a safer mode than matching by name. It has almost no margin of error, but requires a set up of a table beforehand. It’s very simple, but manual work nonetheless.
The Widget
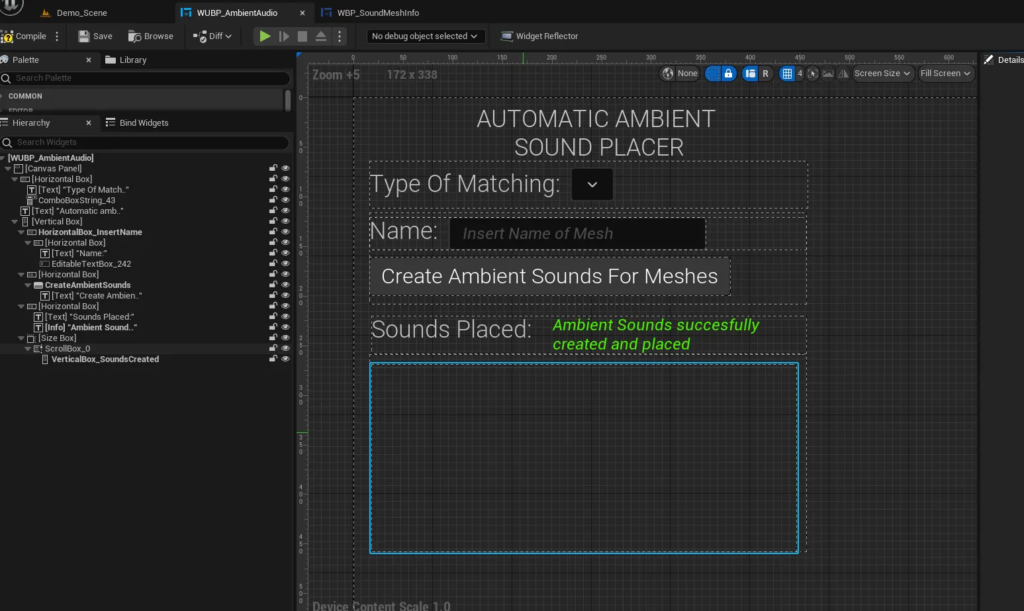
It’s just a collection of vertical and horizontal boxes, scroll boxes, buttons, texts, text boxes, etc. I will not go deeply on this subject, but it’s important to know that this elements work as variables in the Blueprint logic.
The Blueprint Logic
Here’s the full Blueprint. Please note that you can click on the image and double click to zoom further.
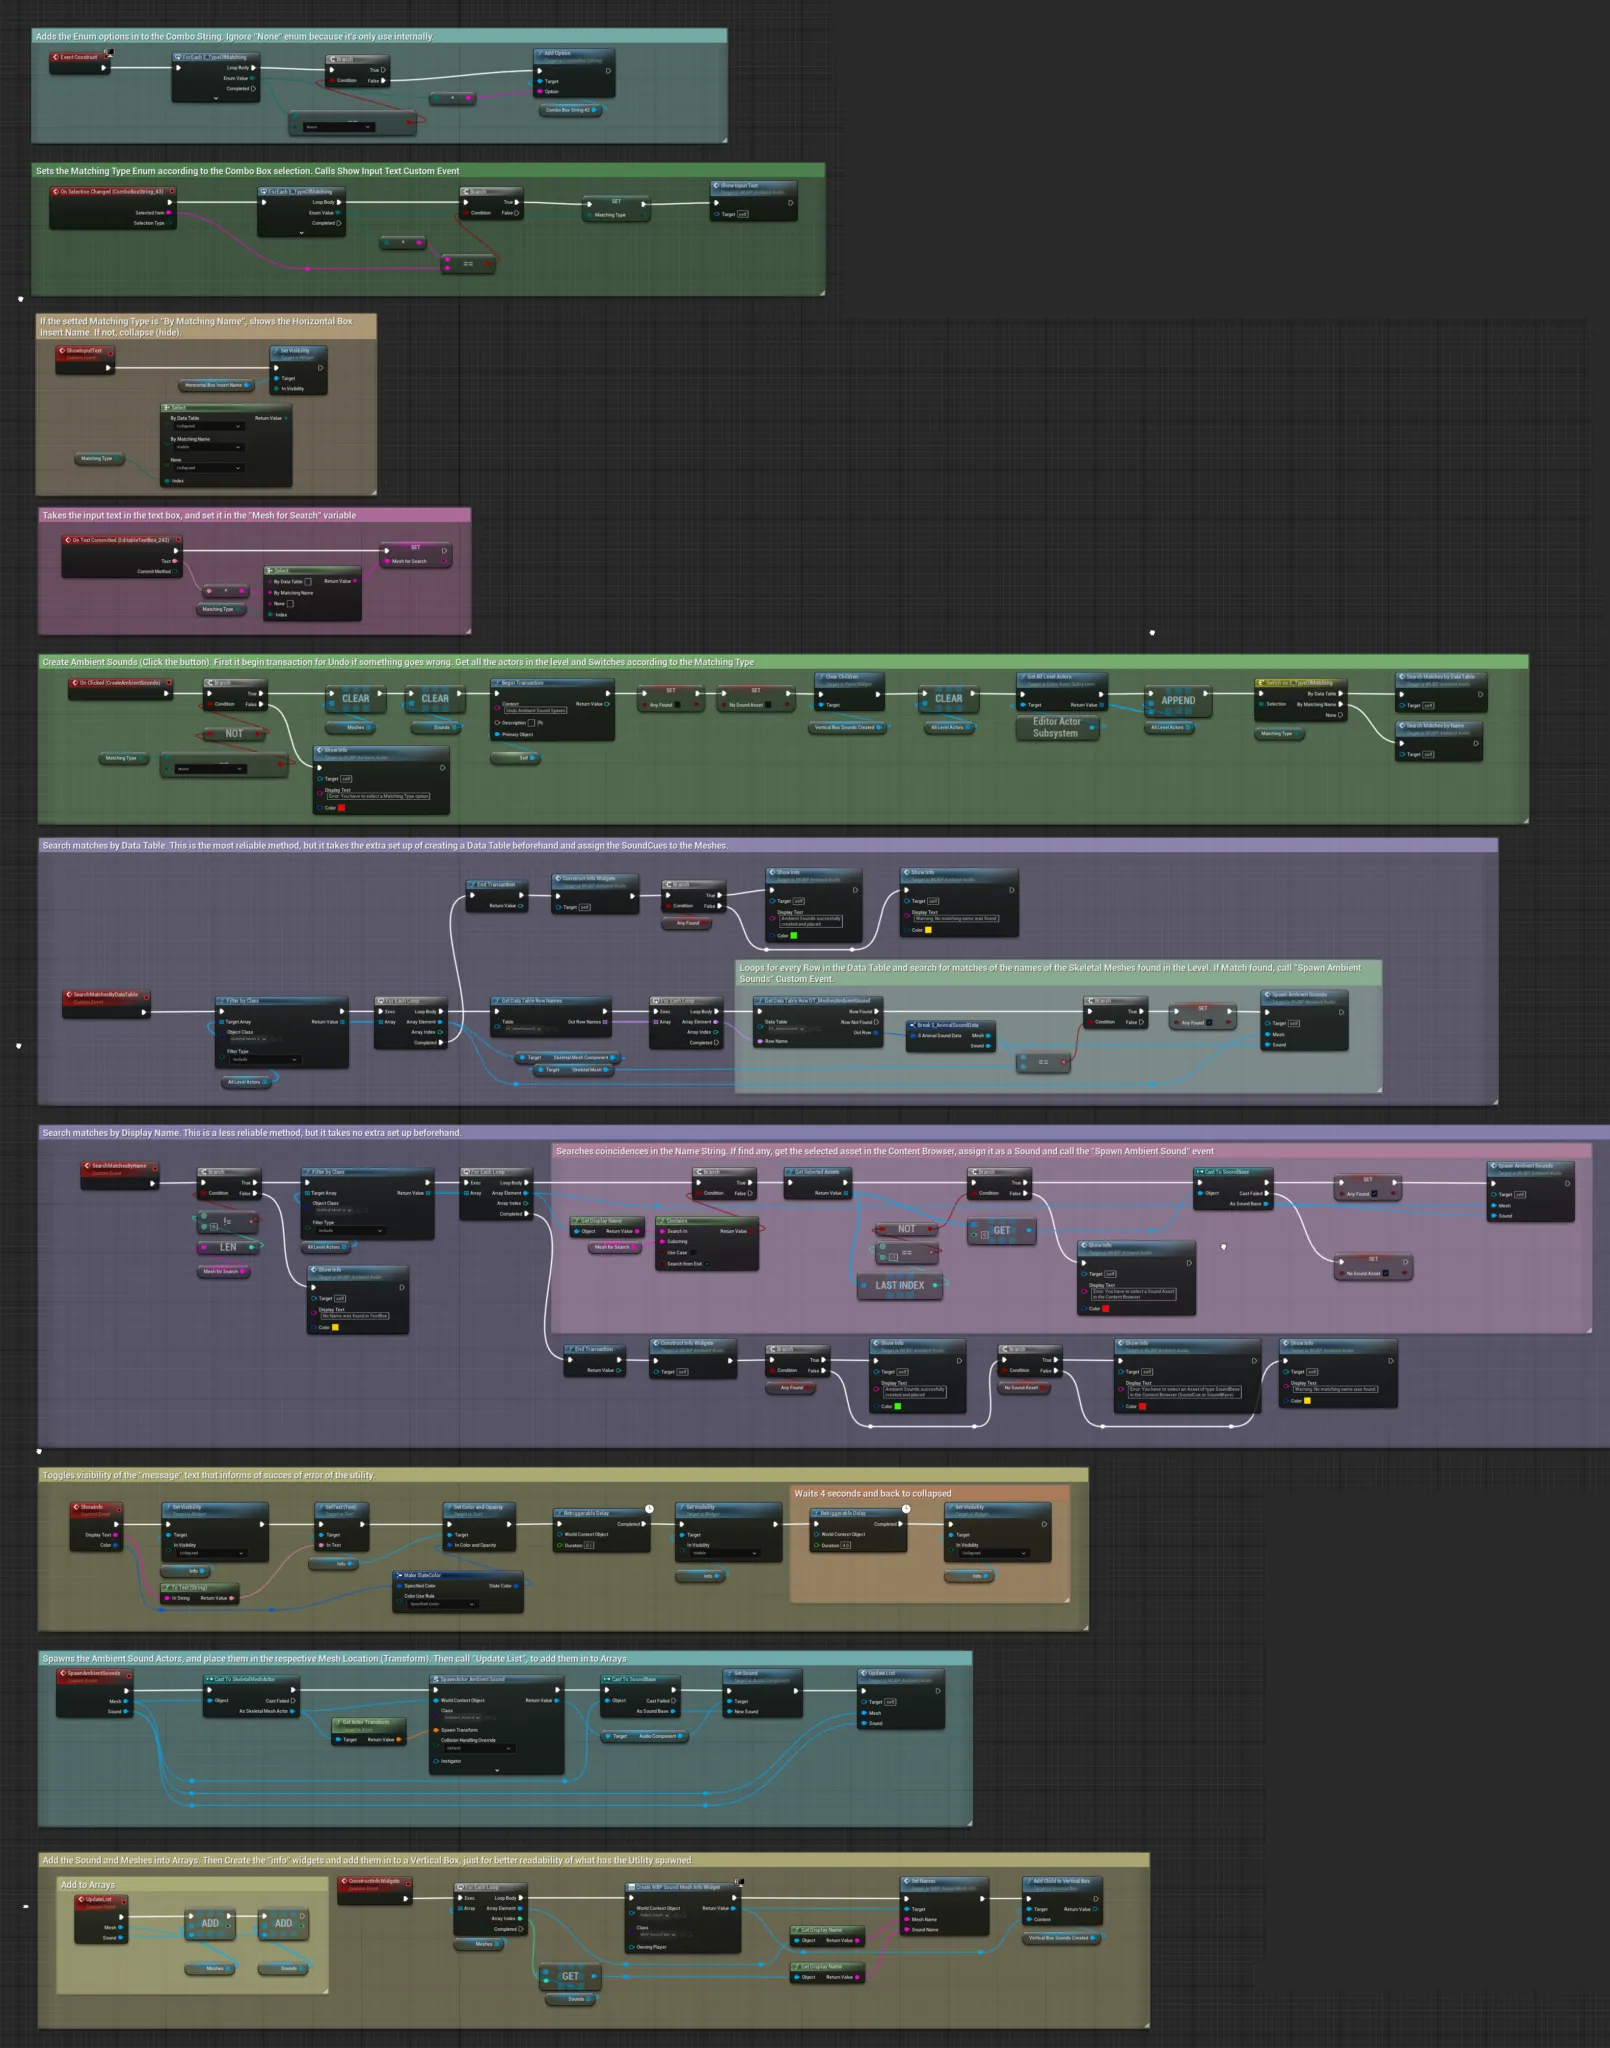
It looks like a lot of things are happening, but in the core it’s really really simple logic. A lot of the nodes are for cosmetic and user friendly functionality.
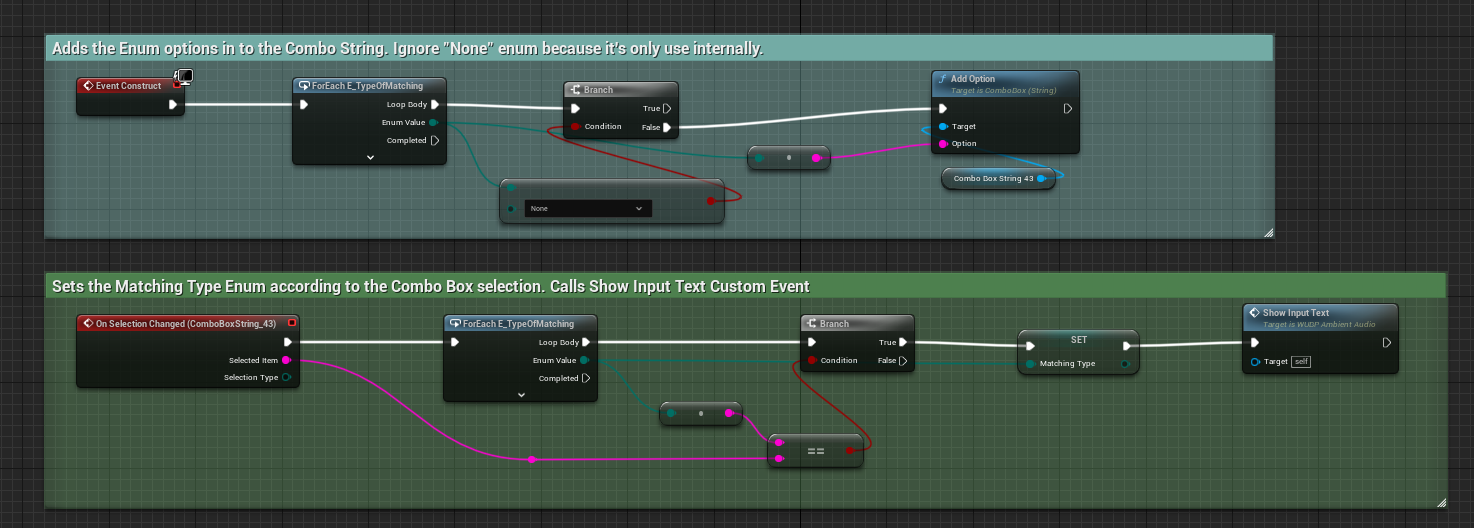
In the Event Construct I’m adding the Enum options (E_TypeOfMatching) into the Combo String. And On Selection Changed, sets the selected option as the Matching Type.

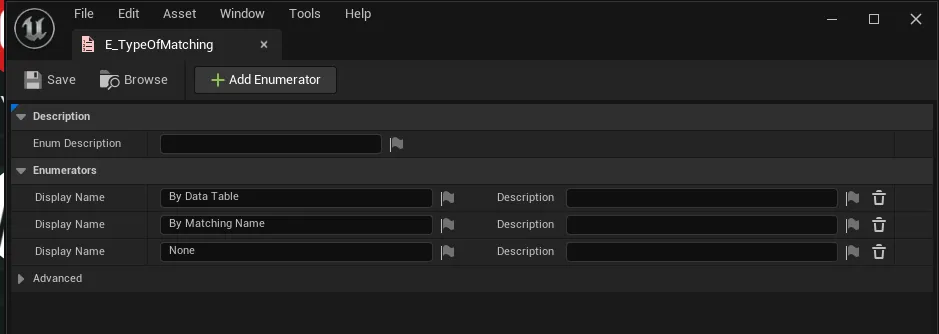
Here I’m hiding and showing the input text box, that only have to be visible when the matching type is “By Matching Name”. When the text is committed is set to a String Variable, for future use.
When the “Create Ambient Sounds” button is clicked, gets all the actors of the level and calls different Custom Events based on the type of Matching Type. It also Begins Transaction, that “records” all the changes in the level, for undoing later if some undesirable outcome happens.

The logic for the Data Table type, simply searchs for all the Meshes in the level, and if found in the Data Table, get the related Sounds and spawn them in the level (calls the Event that does that, actually)

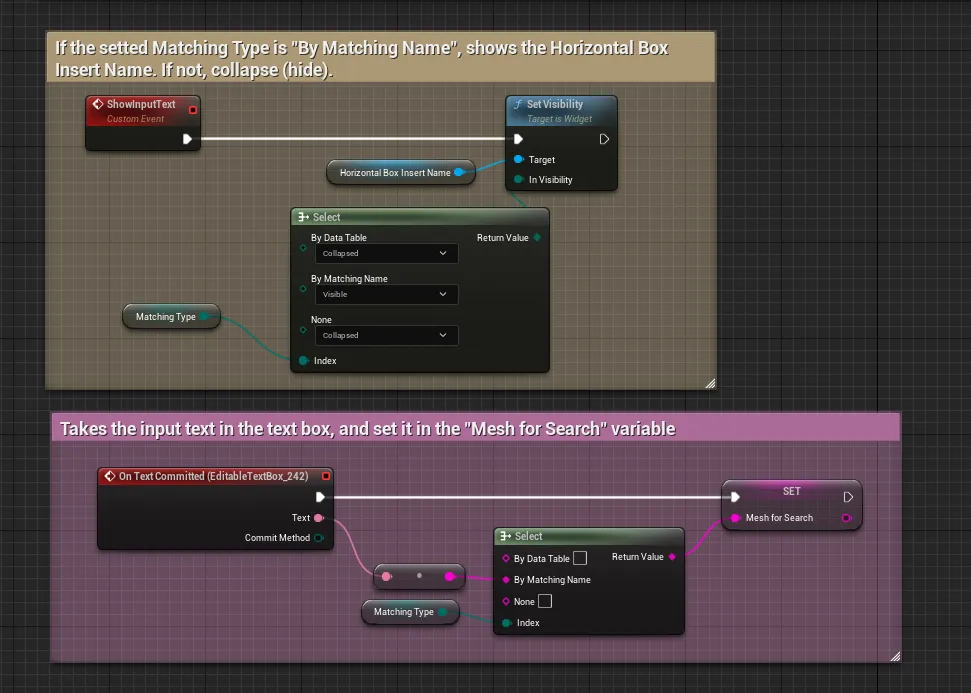
It goes similar for the Matching By Name type, but instead of using a Data Table, looks the Names of all the Meshes in the level, and if the String contains the user input string, a match was found. E.g: A Mesh of a cow named “SKM_Cow_Angus” will Contain the substring “Cow”.
This method is a little bit less reliable than the Data Table one, because you depend on the Meshes being correctly named, but it takes no manual set up, which is often preferable.
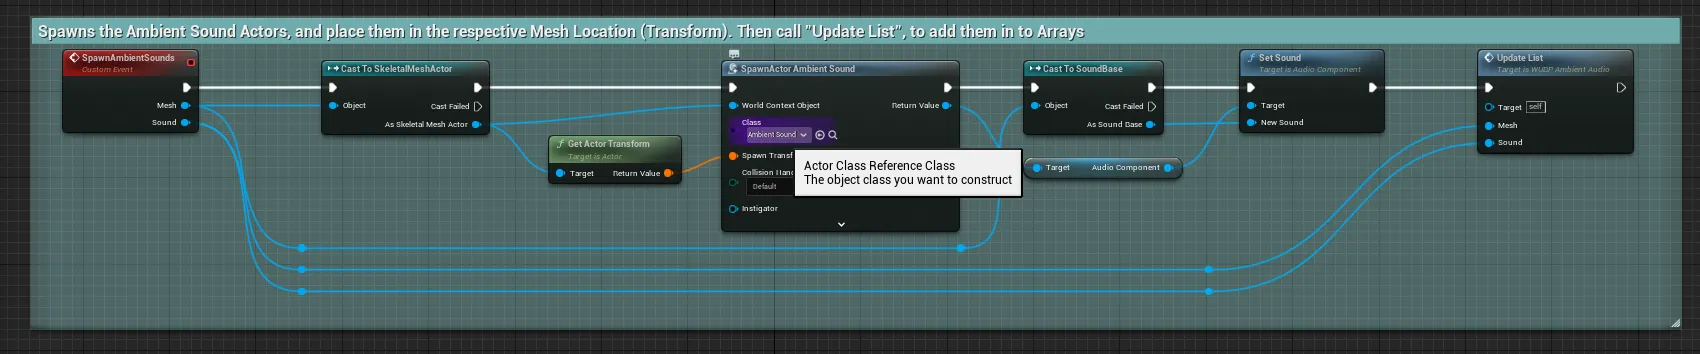
This is the actual event that spawn the Ambient Sound Actors in the Transform (location) of the Meshes.
The rest it’s just cosmetic. It shows a message with the result of the button press. It’s a good idea to add this kind of things for the designers that will use this tool. It will save you lots of answers from them in the future.

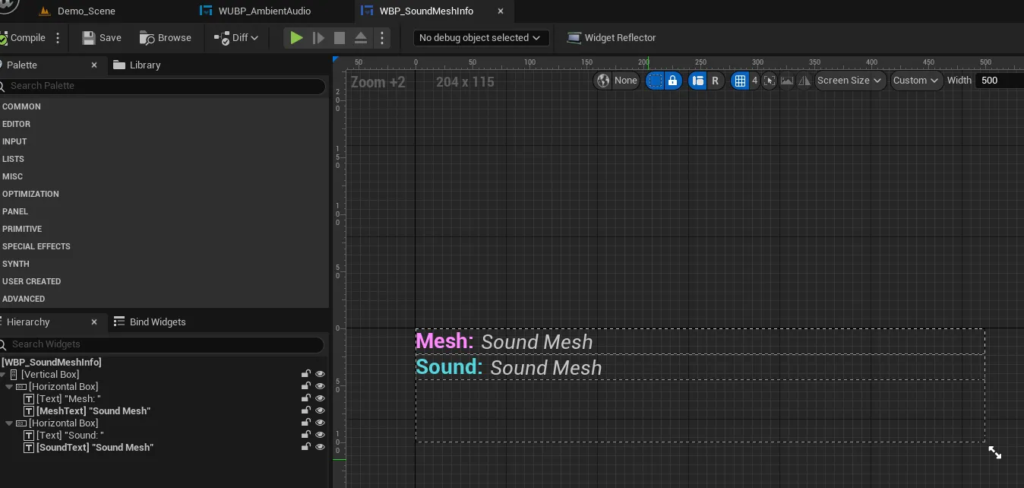
I’m also creating a “Sound Mesh Info Widget”, for each match made, and adding them to a scroll box. It’s a very visual way to communicate the success of the process, and for search for possible match errors.

The result
That’s pretty much it. Using Unreal’s “Editor Utility” systems to create personalized tools is almost crucial to make a Sound Pipeline that focus on the quality of the sound design rather than barely focusing on placing the correct sounds in a level.
I hope you found it interesting!
If you have any comments, please reach out through my Twitter, I would love to see if you have any suggestions to further improve this system!
By the way, I’m making one of this blogs per month so… please stay tuned! Thanks for reading! Till the next one!